Follow these best practices to migrate a Diagnostic Server to a new host.
These steps apply to federated and non federated environments. Steps for (federation environment only) are clearly marked and can be skipped if your environment is not federated.
Step 1: Backup Data Files
- Use the Spotlight Client to verify and record the current Spotlight version. Use the Spotlight Client, About window to do this.
- Stop the Spotlight Diagnostic Server service.
- Locate the Spotlight Diagnostic Server installation folder. By default (in the server where the Diagnostic Server is installed):
C:\Program Files\Quest Software\Diagnostic Server - Copy of this folder to the server you are migrating the Diagnostic Server to. (or a shared drive that this server can access) You will need the path to this folder in
Step 2: Install Spotlight on the new Diagnostic Server host
- Install the same version of the Spotlight client and Diagnostic Server on the destination server as in source server. Use the same Playback database used in the source Diagnostic Server.
- Open the Spotlight Client on the destination server and ensure it connects to the Diagnostic Server
Step 3: Migrate Data
- Stop Diagnostic Server services on the destination server. Open the CMD console using Run As Administrator. Change directories to the Diagnostic Server installation folder. By default:
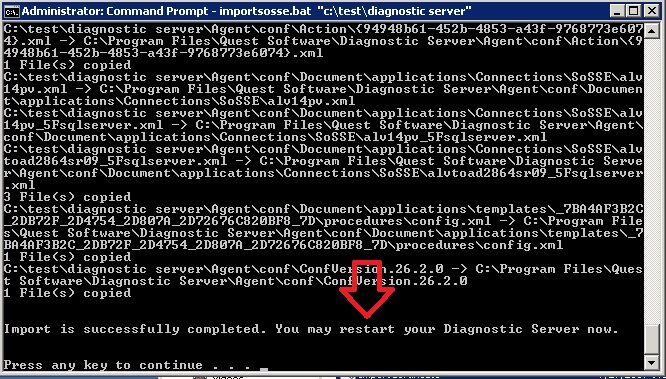
C:\Program Files\Quest Software\Diagnostic Server\Agent\Bin\ - Run: ImportSosse.BAT “<path>” where path is backed up source server path from Step 1: Backup Data Files.
-
You should see the message at the end of process:
- (Federation environment only) Copy FederationService.xml as follows. Click Replace the file in the destination
{DS dir}\Agent\conf\ServiceDefaults\ to {DS dir}\Agent\conf\Service\ - Start Diagnostic Server services on the destination server
Step 4: Test Migrated Application
- Open the Spotlight client on the destination server.
- Verify that connections and custom configurations are migrated.
- Open different configuration windows: Alarms, Scheduling, and Alarm Actions windows to ensure templates and custom settings are preserved.
Step 5: (Federation environment only) Remove source server out of federation
- Click Configure | Diagnostic Server | Federate Diagnostic Servers
- Select the source server then click Remove
- Stop the Diagnostic Server on the source server. Change to Manual start service or uninstall the Spotlight Diagnostic Server and Spotlight Client from the source server if necessary.
Step 6: Migrate Spotlight Playback and Statistic Repository Databases (optional)
Note: Perform these steps only if moving these databases to a new server as well
- Stop the Spotlight Diagnostic Server service both on the destination and source hosts
- Back up and detach the existing Spotlight Playback Database and Spotlight Statics Repository. Move the database mdf file(s) to the new SQL Server Database and attach them.
- In the Spotlight Client, click Configure | Diagnostic Server | Playback Database and enter the new instance name of the Playback Database. Click Configure | Diagnostic Server | Spotlight Statistics Repository and enter the new instance name of the Spotlight Statistics Repository.
Step 7: Configure Spotlight Clients and Go Live
- Open each Spotlight Client. Associate the Spotlight Client with the migrated location. Use Configure | Diagnostic Server | Configure Diagnostic Server Address to change the Address field to the newly located Diagnostic Server host name or IP address.
- For Federated Environments: Open Spotlight Clients that connect to the federation. Use Configure | Diagnostic Server | Federate Diagnostic Servers. Click Add. Enter the location of the newly located Spotlight Diagnostic Server host address to join the destination server to the federation. (Federation environment only)
Step 8: Post-Migration - Update Historical Data
Update the Playback Database and Statistics Repository with the newly located Spotlight Diagnostic Server host name. Do this when Spotlight usage is quiet.
- Stop the newly located Spotlight Diagnostic Server service.
- In SSMS login to the instance(s) holding the Playback Database and Spotlight Statistics Repository.
- Run this query against the Spotlight Repository database in order to obtain the old and new Diagnostic Server names: exec spotlight_get_domains
- Run the script at the bottom of this page against the Spotlight Playback database in order to update the Spotlight Diagnostic Server host name. Be sure to change the new and old Diagnostic Server host names in the script.
Note: Perform these steps only if historical reporting data was configured in source Diagnostic Server.
- In SSMS login to the instance holding your Spotlight Statistics Repository database. Run the following query against the Spotlight Statistic Repository to identify the Domain IDs of the source and destination Diagnostic Server host names:
select * from spotlight_domains - Under SpotlightStatisticsRespository | Programmability node, run SP MoveDiagnosticServerHost()
Enter the input parameter values:
- set @From_Domain = Domain ID of source Diagnostic Server from the query.
- set @To_Domain = Domain ID to destination Diagnostic Server from the query.
- set @FixBug = 0 if the Diagnostic Server port is 3843, otherwise, set to 1
Script run in Step 8 point 4
    declare @NewHostName varchar(64)
    DECLARE @OldHostName varchar(64)
    SET @NewHostName = ''
    SET @OldHostName = ''

    /*  If running manually

     set @NewHostName to new DS name, @OldHostName to old DS name.
     Find it from [pb_domain_name] column in dbo.spotlight_playback_alarms table

    -- */

    WHILE (1=1)
    BEGIN
    	BEGIN TRAN

    	UPDATE TOP (5000) [dbo].[spotlight_playback_alarms]
    	SET [pb_domain_name] = @NewHostName + ':3843'
    	WHERE [pb_domain_name] = @OldHostName + ':3843'
    	IF @@ROWCOUNT = 0
    	BEGIN
    		COMMIT
    		BREAK;
    	END
    	COMMIT
    END

    WHILE (1=1)
    BEGIN
    	BEGIN TRAN

    	UPDATE TOP (5000) [dbo].[spotlight_playback_data]
    	SET [pb_domain_name] = @NewHostName + ':3843'
    	WHERE [pb_domain_name] = @OldHostName + ':3843'
    	IF @@ROWCOUNT = 0
    	BEGIN
    		COMMIT
    		BREAK;
    	END
    	COMMIT
    END

    WHILE (1=1)
    BEGIN
    	BEGIN TRAN

    	UPDATE TOP (5000) [dbo].[spotlight_playback_states]
    	SET [pb_domain_name] = @NewHostName + ':3843'
    	WHERE [pb_domain_name] = @OldHostName + ':3843'
    	IF @@ROWCOUNT = 0
    	BEGIN
    		COMMIT
    		BREAK;
    	END
    	COMMIT
    END

    WHILE (1=1)
    BEGIN
    	BEGIN TRAN

    	UPDATE TOP (5000) [dbo].[spotlight_playback_audit]
    	SET [pb_agent_id] = @NewHostName + ':3843'
    	WHERE [pb_agent_id] = @OldHostName + ':3843'
    	IF @@ROWCOUNT = 0
    	BEGIN
    		COMMIT
    		BREAK;
    	END
    	COMMIT
    END